Multi-color 3D printing comparison gets messy because “color printing” can mean a two-filament FDM sign, a painted SLA figurine, WJP full-color resin, dyed SLS nylon, or PAC full-color nylon. Those routes do not solve the same problem. I start by asking what the color is supposed to do: decorate, label, separate functional zones, carry brand identity, or reproduce a person or object.
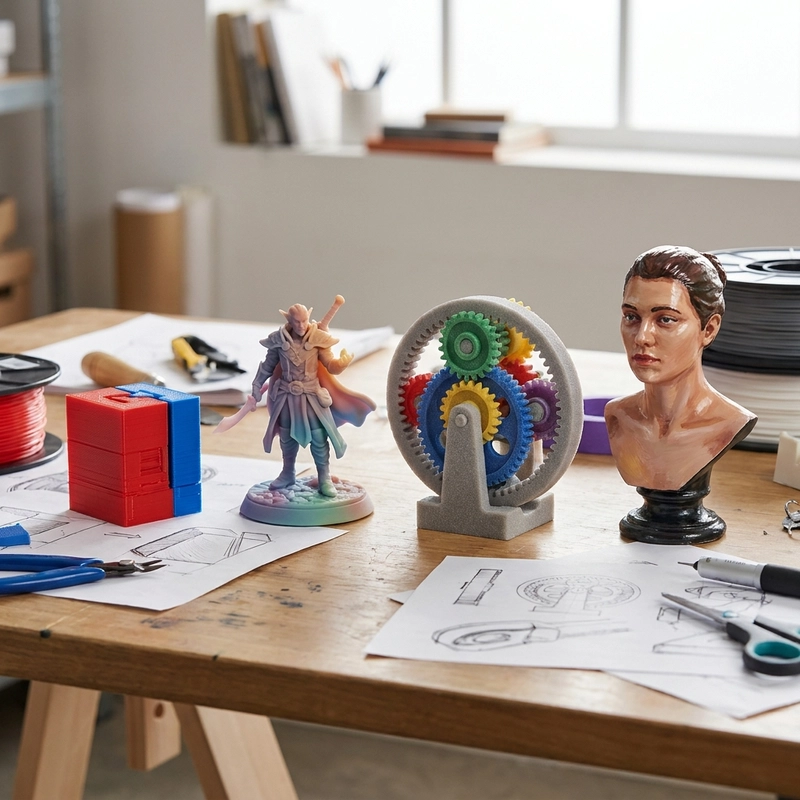
If color is only a label, a simple process may work. If color must reproduce skin tone, logos, anatomical zones, or product CMF intent, the file and proofing work become much more serious. A good multi-color 3D printing comparison is not about which process is most colorful. It is about which process matches the material, surface, repeatability, and budget.
Multi-color 3D printing comparison by process
| Route | Good use | Main risk |
|---|---|---|
| Dual-color FDM | Simple logos, labels, education models, low-cost color separation | Purge waste, layer lines, limited gradients |
| Colored or painted SLA | Fine detail, figurines, product appearance samples | Manual labor, coating adhesion, resin toughness |
| WJP full-color resin | Portraits, anatomy, cultural products, visual models | File quality, color proofing, resin behavior |
| PAC/full-color nylon | Colored functional prototypes and handled display parts | Powder texture, color accuracy, depowdering |
| Dyed SLS/MJF nylon | Durable single-color nylon batches | Limited color complexity |
Dual-color FDM is the simplest route. It works when the color boundary is part of the geometry: raised text, panel zones, arrows, simple teaching models. It is weak for gradients, skin, high-detail figurines, and smooth surfaces. Do not choose it for photographic color.
Painted SLA still wins when artistic control matters. A skilled painter can add shading, metallic effects, gloss variation, and local repair that digital color may not match. The cost is labor and repeatability. For coating-related failures, read Zesmir’s resin print paint adhesion article.
Multi-color 3D printing comparison for file preparation
File preparation is the quiet bottleneck. FDM color may only need separated bodies or filament assignments. WJP resin and full-color nylon may need OBJ, VRML, 3MF, texture maps, UV coordinates, and clean color references. Missing textures can destroy a color job even if the geometry is printable.
I like approving color in two steps: geometry first, color second. A visually beautiful part with wrong holes still fails. A mechanically correct part with dull color may also fail. When both matter, approve both. For WJP details, read WJP full-color resin 3D printing. For nylon color plus handling, read PAC full-color nylon 3D printing.
Color boundaries should be designed, not hoped for. If a button label must be sharp, raised or engraved geometry may work better than a texture alone. If a logo crosses a curved surface, UV mapping needs attention. If a medical model uses color to identify anatomy, the color zones should be checked against the intended teaching use, not only against the render.
Cost and repeatability in multi-color 3D printing comparison
Color cost is not just printing time. FDM can waste material through purging. Painting adds labor and drying time. WJP and full-color nylon add file checking and proofing. Finishing, sealing, packing, and color sample approval all belong in the estimate. A cheap print-only quote can become expensive after color correction.
Repeatability matters when color is used for brand, medical teaching, safety marking, or customer likeness. Keep the approved sample, color reference, finish route, and lighting condition. A part that looks acceptable under a workshop lamp may look different in a retail display or exhibition hall.
Hand finishing still has a place. Metallic effects, hand shading, glossy eyes, aged texture, and local repair are often better done by a skilled painter than by native color printing. The tradeoff is labor and repeatability. For a premium hero sample, painting may win. For a batch of teaching models, digital color may be more consistent.
Packaging can decide whether the color survives. Painted resin can chip, full-color resin can rub on raised detail, and colored nylon can scuff at edges. If the part will ship as a gift, retail sample, or trade-show model, packing belongs in the color workflow.
Quantity changes the decision too. One hero figurine may justify hand painting. Twenty education models may justify WJP or PAC proofing. A hundred simple labeled parts may be cheaper as dyed nylon with engraved markings. Multi-color 3D printing comparison should always include quantity because labor does not scale the same way as digital color.
For neutral process vocabulary, the NIST additive manufacturing resource is a useful reference. It helps keep FDM, resin, and powder-bed processes separated when comparing color routes.
RFQ question that decides the color route
Ask what happens if the color is slightly wrong. If the part still works, choose the most practical route. If color defines the product, use a proof sample and real color references. A multi-color 3D printing comparison is only useful when the color purpose, surface expectation, material requirement, and quantity are all visible.
My short rule is this: use FDM for simple solid color separation, WJP resin for detailed visual color, PAC nylon when color and handling strength meet, dyeing for durable single-color nylon, and painting when artistic control matters more than automated repeatability.
For RFQs, send the color file, texture folder, color reference, quantity, finish target, viewing distance, handling requirement, and whether a proof sample is required. The process choice becomes clearer when the color problem is described like manufacturing data instead of a render request.